
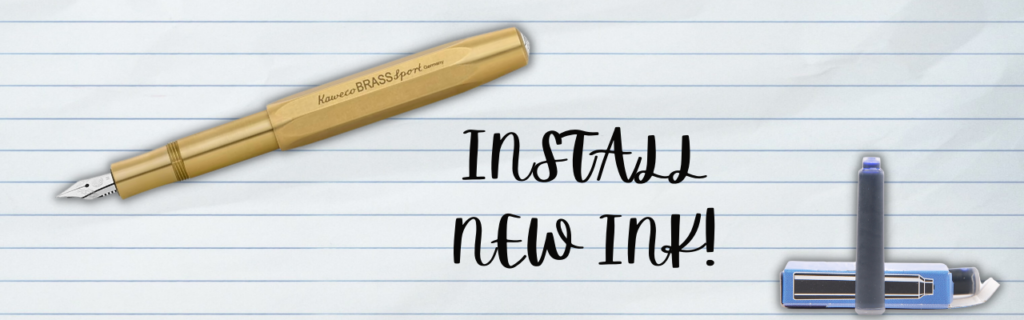
Installing ink cartridges in a fountain pen is a simple process that can be completed in just a few steps. In this article, we will guide you through the process of How to Install Ink Cartridges using the Kaweco Fountain Pen as an example.
First, you will need to unscrew the barrel and remove any items stored inside. Then, locate the cartridge’s opening – the correct end will usually have a cup-like rim. Insert the end with the opening into the pen’s grip section and press it in firmly until you feel it puncture. Reassemble the pen, cap it, and keep it pointing downwards to help the ink saturate the feed. It may take an hour or two for the ink to fully saturate, so don’t worry if the pen doesn’t start writing right away.
Key Takeaways
- Installing ink cartridges in a fountain pen is a simple process that can be completed in just a few steps.
- The correct end of the cartridge usually has a cup-like rim, and it should be inserted firmly into the pen’s grip section.
- After installing the cartridge, keep the pen pointing downwards to help the ink saturate the feed.
Understanding Cartridges
If you’re new to using fountain pens, you may be wondering how to install ink cartridges. Fortunately, cartridges are very easy to install and we’ll show you how with this Kaweco Ice Sport Fountain Pen.
First, unscrew the barrel and remove anything that’s stored inside. Next, find the cartridge’s opening. The correct end usually has a cup-like rim. To install the cartridge, insert the end with the opening into the pen’s grip section. Press it in very firmly until you feel it puncture. Then, reassemble the pen and cap it.
It’s important to keep the pen pointing downwards to help the ink saturate the feed. This may take an hour or two, so don’t worry if the pen doesn’t start writing right away.
It’s worth noting that cartridges vary across brands, but they are all installed the same way.
Choosing the Correct Cartridge End
When installing ink cartridges, it is important to choose the correct end to ensure proper functioning of your pen. The correct end of the cartridge usually has a cup-like rim. Here are the steps to install the cartridge:
- Unscrew the barrel of your pen and remove anything that may be stored inside.
- Find the opening of the cartridge with the cup-like rim and insert it into the pen’s grip section.
- Press the cartridge in firmly until you feel it puncture.
- Reassemble the pen and cap it.
- Keep the pen pointing downwards to help the ink saturate the feed. This process may take an hour or two, so don’t worry if the pen doesn’t start writing right away.
It is important to note that cartridges may vary across brands, but they are all installed in the same way. To learn more about using cartridges.
Installing the Cartridge for Fountain Pens
Installing ink cartridges is a simple process that can be done in just a few steps. To install a cartridge in your Kaweco Ice Sport Fountain Pen, follow these instructions:
- Unscrew the barrel of the pen and remove anything that may be stored inside.
- Locate the opening of the cartridge. The correct end usually has a cup-like rim.
- Insert the end with the opening into the pen’s grip section.
- Press the cartridge in firmly until you feel it puncture.
- Reassemble the pen and cap it.
- Keep the pen pointing downwards to help the ink saturate the feed. This may take an hour or two, so don’t worry if the pen doesn’t start writing right away.
Video Tutorial: How to Install Ink Cartridges
JetPens is a YouTube creator who makes videos all about Pens, we like their video tutorial on how to install ink cartridges, this will help you install your ink cartridges for your fountain pens.
How to Clean a Fountain Pen
Fountain pens are a great writing tool, but they require proper maintenance to keep them working properly. Cleaning your fountain pen every four to eight weeks is essential to ensure its smooth flow and performance. In this article, we will guide you on how to clean a fountain pen and provide instructions on cleaning specific pen parts.
How to Do a Basic Cleaning:
- Uncap the pen and remove the nib section from the barrel.
- If your fountain pen uses a cartridge or converter, remove it from the section.
- Hold the nib section under cool, running water for a few seconds.
- Next, soak the nib section in a cup of clean water.
- Replace the water when it becomes saturated with ink.
- Repeat this process until the water remains clear for at least an hour.
- Remove the nib section from the water and let it dry.
- Once the nib section is dry, install the cartridge or converter, and screw the nib section back into the barrel.
How to Flush a Fountain Pen
If your pen is writing poorly or you’re ready to change inks, we recommend flushing the pen. Flushing, or forcing water through the nib section, ensures that the feed is completely clean. For pens that have converters or built-in filling systems, use the following steps:
- Disassemble and rinse the pen, following steps one and two of the previous instructions.
- Place the open end of the converter or barrel in a cup of water.
- Fill and empty the ink chamber until it is clean.
- Reattach the converter or barrel to the nib section and submerge the nib in a cup of clean water.
- Use the converter or built-in filling system to cycle water in and out of the pen.
- Repeat until no more ink is visible when pushing water out of the pen.
- Replace the water if it
Reassembling the Pen
Now that you have successfully inserted the ink cartridge, it’s time to reassemble the pen. Follow these simple steps:
- Screw the barrel back onto the grip section of the pen.
- Cap the pen to prevent any ink from drying out.
- Keep the pen pointing downwards to help the ink saturate the feed.
It’s important to note that it may take an hour or two for the ink to fully saturate the feed. Don’t worry if the pen doesn’t start writing right away.
Remember, cartridges vary across brands, but they are all installed the same way. For more information on using cartridges.
Ink Saturation Process
Once you have installed the ink cartridge into your fountain pen, it is important to properly saturate the feed with ink. To do this, keep the pen pointing downwards for an hour or two after installing the cartridge. This will allow the ink to flow from the cartridge into the feed, ensuring a consistent flow of ink while writing.
It is important to note that the time it takes for the ink to fully saturate the feed may vary depending on the brand of cartridge used. However, regardless of the brand, the ink saturation process remains the same.
In summary, after installing the ink cartridge into your fountain pen, keep the pen pointing downwards for an hour or two to allow the ink to saturate the feed. This will ensure a consistent flow of ink while writing.
Variations Across Brands
When it comes to installing ink cartridges, the process is fairly standard across all brands. However, there are some variations to keep in mind. Here are a few things to consider:
- The opening of the cartridge is usually located at the end with a cup-like rim. This is the end that should be inserted into the pen’s grip section.
- Cartridges may take some time to saturate the feed and start writing. It’s recommended to keep the pen pointing downwards for an hour or two after installation to help with this process.
- While the basic installation process is the same, the size and shape of cartridges can vary across brands. It’s important to make sure you’re using the correct cartridge for your pen.
- If you’re unsure about which cartridge to use, check the manufacturer’s website or consult with a pen expert.
Overall, installing ink cartridges is a simple process that can be easily mastered with a bit of practice. With these tips in mind, you’ll be able to enjoy your fountain pen and its smooth writing experience in no time.
Kaweco Brass Sport Fountain Pen

GLIDES across the paper!
- 5 x 1 x 1 inches
- 2.11 ounces
- Gold color
- Point type: Fine
Conclusion
Now that you have learned how to install ink cartridges, you can easily switch out cartridges in your fountain pen and continue writing without interruption. Remember to unscrew the barrel and remove any stored items before inserting the cartridge. Make sure to insert the end with the opening into the pen’s grip section and press it in firmly until you feel it puncture. After reassembling the pen, cap it and keep it pointing downwards to help the ink saturate the feed. It may take an hour or two for the ink to fully saturate, so don’t worry if the pen doesn’t start writing right away.
FAQ – How to Install Ink Cartridges in a Fountain Pen
If you’re new to fountain pens, installing ink cartridges can seem daunting. However, it’s a simple process that you can easily learn. In this section, we’ll show you how to install ink cartridges in your Kaweco Ice Sport Fountain Pen.
- Unscrew the Barrel and Remove Anything Inside
The first step is to unscrew the barrel of your fountain pen and remove anything that’s stored inside. This could be a converter or an empty cartridge.
- Find the Cartridge’s Opening
Next, find the opening of the ink cartridge. The correct end usually has a cup-like rim that fits into the pen’s grip section.
- Insert the Cartridge and Press Firmly
Insert the end with the opening into the pen’s grip section and press it in very firmly until you feel it puncture. This ensures that the ink will flow smoothly.
- Reassemble the Pen
Once the cartridge is installed, reassemble the pen by screwing the barrel back on.
- Cap the Pen and Keep it Pointing Downwards
Cap the pen and keep it pointing downwards to help the ink saturate the feed. This may take an hour or two, so don’t worry if the pen doesn’t start writing right away.
Cartridges vary across brands, but they are all installed the same way. If you want to learn more about using cartridges.


Leave a Reply
You must be logged in to post a comment.