
Calligraphy is more than just fancy writing; it is a captivating art form that allows individuals to express their unique creativity through the creation of stunning, hand-crafted letters. By utilizing a calligraphy marker, this exquisite art becomes accessible to a wide range of people, from enthusiastic beginners eager to learn to seasoned artists who have honed their skills over the years. This comprehensive guide will take you step-by-step through everything you need to know, from selecting the perfect marker that suits your style to mastering advanced techniques that will elevate your calligraphy to new heights.
Key Takeaways
- Know calligraphy markers to find the best for you.
- Practice strokes for a solid foundation.
- Try styles and embellishments for your unique look.
- Learn techniques like blending and shadows to improve.
- Care for tools to extend lifespan and performance.
Choosing the Right Calligraphy Marker
Types of Calligraphy Markers
When it comes to calligraphy, the type of marker you choose can make a big difference. There are several types to consider:
- Brush Markers: These have a flexible tip that mimics a paintbrush, allowing for both thick and thin strokes.
- Chisel Tip Markers: These have a flat, angled tip perfect for creating sharp, clean lines.
- Dual Tip Markers: These offer both a brush tip and a fine tip, giving you more versatility.
Calligraphy Brush Pens
Factors to Consider When Buying
Selecting the right marker involves more than just picking a type. Here are some factors to keep in mind:
- Ink Quality: High-quality ink ensures smooth flow and vibrant colors.
- Tip Durability: A durable tip will last longer and maintain its shape better.
- Comfort: Look for markers with a comfortable grip, especially if you plan to practice for long periods.
- Color Palette: Choose markers that offer a wide range of colors to enhance your artwork.
Recommended Brands
There are many brands out there, but some stand out for their quality and reliability. Here are a few recommended ones:
- Tombow: Known for their dual-tip markers, Tombow offers excellent ink quality and durability.
- Copic: These markers are favored by professionals for their wide color range and refillable ink.
- Sakura: A great choice for beginners, offering affordable yet high-quality markers.
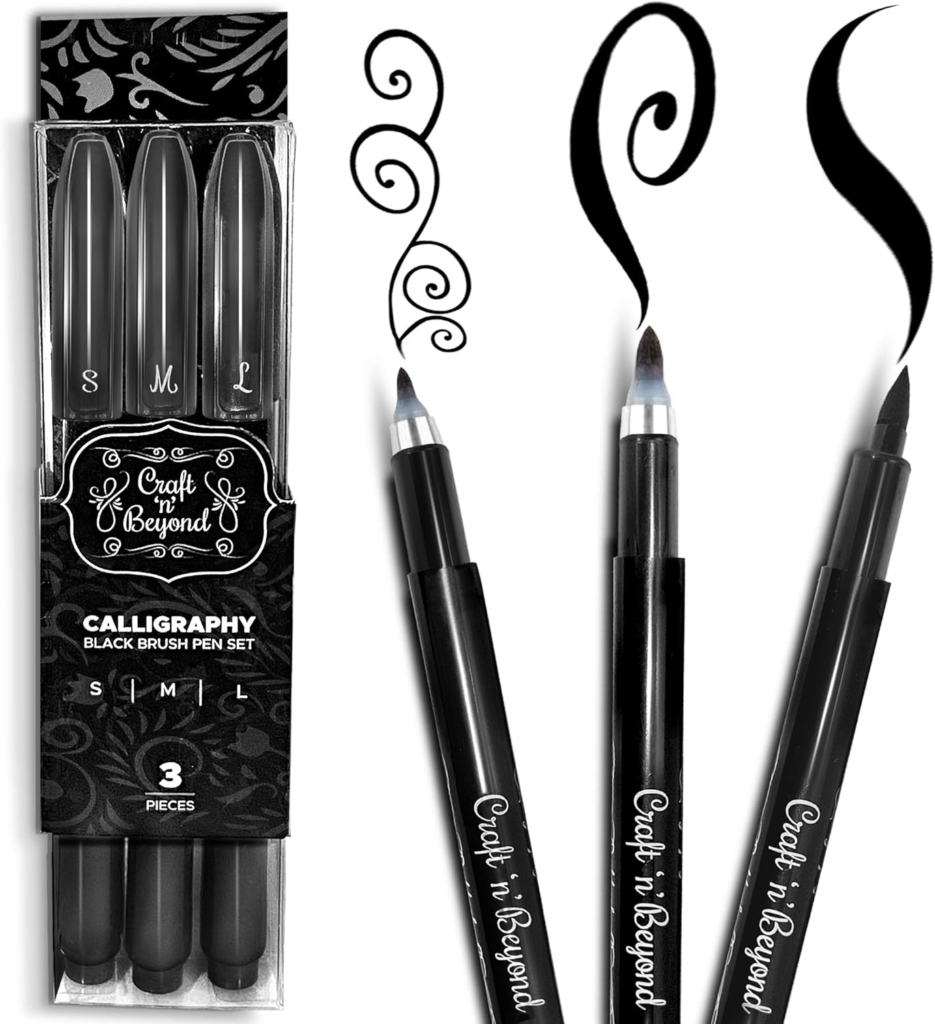
- Craft ‘n’ Beyond: Marker pens and their versatility in various art projects.
Remember, mastering calligraphy begins with the right tools. Take your time to choose the best marker for your needs, and you’ll be well on your way to creating beautiful art.
Mastering Basic Calligraphy Strokes

Before diving into creating beautiful letters, it’s crucial to understand the basic strokes. These strokes are the foundation of calligraphy and mastering them will set you up for success.
Understanding Thick and Thin Strokes
One of the fundamental rules in calligraphy is the concept of thick and thin strokes. When you move your pen downward, apply pressure to create a thick stroke. Conversely, when moving the pen upward, use minimal pressure to achieve a thin stroke. Down equals thick, up equals thin. This simple rule will help you create beautiful, consistent letters.
Practicing Basic Shapes
Start by practicing basic shapes to get a feel for the pen and the pressure needed for different strokes. Here are some essential shapes to practice:
- Upstroke: A light, thin stroke moving upward.
- Downstroke: A heavy, thick stroke moving downward.
- Overturn Stroke: Starts with a light upstroke and transitions into a heavy downstroke.
- Underturn Stroke: Begins with a downstroke and shifts into a light upstroke.
- Oval Stroke: Forms a complete oval shape, starting with a thin upstroke, thickening into a downstroke, and thinning out again.
- Compound Curve: Combines an underturn and an overturn in one fluid movement.
Common Mistakes to Avoid
Avoiding common mistakes can save you a lot of frustration. Here are some pitfalls to watch out for:
- Inconsistent Pressure: Applying inconsistent pressure can make your strokes look uneven. Practice maintaining steady pressure.
- Skipping Basic Strokes: Jumping straight into letters without mastering basic strokes can lead to sloppy writing. Take your time with the basics.
- Ignoring Guidelines: Guidelines help maintain consistent height and spacing. Use them to keep your work neat.
Remember, practice makes perfect. Don’t rush, take your time with each stroke. It’s okay if they don’t look perfect on the first go. Keep practicing, and soon enough, you’ll see improvement.
Mastering these basic strokes will bring you one step closer to creating stunning calligraphy art!
Developing Your Unique Calligraphy Style

Experimenting with Different Fonts
Exploring various calligraphy styles can help you find what resonates with you. Try out different fonts like Copperplate, Brush Lettering, and Gothic. Each style has its own charm and can add depth to your artistic expression.
Incorporating Flourishes and Embellishments
Adding flourishes and embellishments can make your work stand out. These extra touches can transform simple lettering into a piece of art. Practice adding swirls, loops, and other decorative elements to your letters.
Finding Inspiration
Look for inspiration in everyday life. Nature, architecture, and even other forms of creative writing can spark new ideas. Don’t be afraid to experiment and push your creative boundaries. The more you explore, the more unique your style will become.
Remember, the journey to mastering calligraphy is just as important as the destination. Enjoy the process and watch your skills flourish.
Advanced Techniques with Calligraphy Markers
Blending Colors and Gradients
Blending colors and creating gradients can add a stunning effect to your calligraphy. Start by choosing two or more colors that complement each other. Begin with the lighter color and gradually add the darker shade. Use a blending brush or a piece of scrap paper to mix the colors smoothly. This technique can make your art supplies look more vibrant and dynamic.
Creating Shadows and Depth
Adding shadows and depth to your calligraphy can make it pop off the page. To achieve this, use a slightly darker shade of the same color or a gray marker. Draw a thin line along one side of each letter to mimic a shadow. This simple trick can give your writing a 3D effect, making it more eye-catching.
Using Metallic and Glitter Markers
Metallic and glitter markers can add a touch of elegance and sparkle to your calligraphy. These markers are perfect for special occasions like weddings or holiday cards. When using metallic markers, write slowly to ensure the ink flows smoothly. For glitter markers, shake them well before use to distribute the glitter evenly. These writing tools can make your projects shine and stand out.
Caring for Your Calligraphy Tools
Proper care for your calligraphy tools ensures they last longer and perform better. Here’s how to keep them in top shape.
Cleaning Your Markers
After a session, gently rinse your nibs and brushes under lukewarm water. Avoid hot water as it can damage the materials. Use a soft cloth to wipe them dry. Proper cleaning prevents ink buildup and keeps your tools in good condition.
Proper Storage Solutions
Store your nibs in a small container or nib box, keeping them in a dry area away from humidity to prevent rusting. Let your brushes air dry upside down or lay them flat to avoid water soaking into the handle. Close your ink bottles tightly and store them upright in a cool, dark place to prevent the ink from drying out or getting exposed to sunlight.
Extending the Life of Your Tools
By taking a few extra minutes to clean and store your tools properly, you’ll make your calligraphy journey smoother and more enjoyable. Plus, you’ll save some money by extending the life of your tools!
Practical Applications of Calligraphy

Calligraphy isn’t just about creating beautiful letters; it has many practical uses that can add a personal touch to various projects. Here are some ways you can use your calligraphy skills in everyday life:
Designing Invitations and Cards
Creating custom invitations and cards is one of the most popular uses of calligraphy. Whether it’s for weddings, birthdays, or holidays, a hand-lettered card adds a unique and personal touch. Your friends and family will appreciate the effort and artistry that goes into each piece.
Creating Home Decor
Calligraphy can also be used to make beautiful home decor items. From framed quotes to decorative signs, your calligraphy skills can turn ordinary items into extraordinary pieces of art. This is a great way to showcase your talent and add a personal flair to your living space.
Personalizing Gifts
Adding a calligraphic touch to gifts can make them even more special. You can personalize items like bookmarks, journals, and even stationery sets. This not only makes the gift unique but also shows the recipient that you put thought and effort into their present.
Calligraphy allows you to transform everyday items into works of art, making each piece special and memorable.
By incorporating calligraphy into these practical applications, you can enhance your projects and bring a touch of elegance to everyday items. So, grab your markers and start creating!
Troubleshooting Common Issues

Dealing with Ink Bleeding
Ink bleeding can be a common problem when using calligraphy markers. To prevent this, use high-quality paper designed for calligraphy. Avoid using too much pressure, as this can cause the ink to spread. If bleeding occurs, try switching to a different type of paper or marker.
Fixing Uneven Strokes
Uneven strokes can make your calligraphy look messy. Ensure you are holding the marker at the correct angle and applying consistent pressure. Practicing basic shapes and strokes regularly can help improve your control and consistency.
Handling Marker Dry-Out
Markers can dry out if not stored properly. Always cap your markers tightly after use and store them horizontally. If a marker dries out, try soaking the tip in water for a few minutes to revive it. If this doesn’t work, it might be time to replace the marker.
With patience and practice, anyone can master calligraphy. Remember to take care of your tools and practice regularly to avoid common issues.
Having trouble with your pens? Our “Troubleshooting Common Issues” section is here to help! From ink flow problems to nib issues, we cover it all. Visit our website to find detailed guides and solutions. Don’t let pen problems slow you down!
Conclusion
Mastering the art of calligraphy with a marker is a rewarding journey that combines patience, practice, and creativity. By following the steps and tips outlined in this guide, you can develop your unique style and improve your skills over time. Remember, the key to success is consistent practice and a willingness to experiment with different techniques and tools. Don’t be afraid to make mistakes, as they are an essential part of the learning process. Keep pushing your creative boundaries, and most importantly, have fun with your calligraphy practice. Happy writing!
Frequently Asked Questions
What is the best type of calligraphy marker for beginners?
For beginners, felt-tip calligraphy markers are a great choice. They are easy to use and control, making them perfect for practicing basic strokes.
How do I create thick and thin strokes with a calligraphy marker?
To create thick strokes, apply more pressure on the marker. For thin strokes, use light pressure. The difference in pressure will produce varying line widths.
What should I do if my marker starts to dry out?
If your marker starts to dry out, try storing it horizontally with the cap on tightly. You can also dip the tip in a bit of water to moisten it.
How can I prevent ink from bleeding through the paper?
To prevent ink from bleeding, use high-quality, thicker paper designed for calligraphy. Avoid using regular printer paper as it is too thin.
Can I blend colors with calligraphy markers?
Yes, you can blend colors by overlapping strokes while the ink is still wet. You can also use a blending marker to mix the colors smoothly.
How do I clean my calligraphy markers?
To clean your markers, gently wipe the tip with a damp cloth. Avoid soaking the marker in water, as this can damage it.


Leave a Reply
You must be logged in to post a comment.